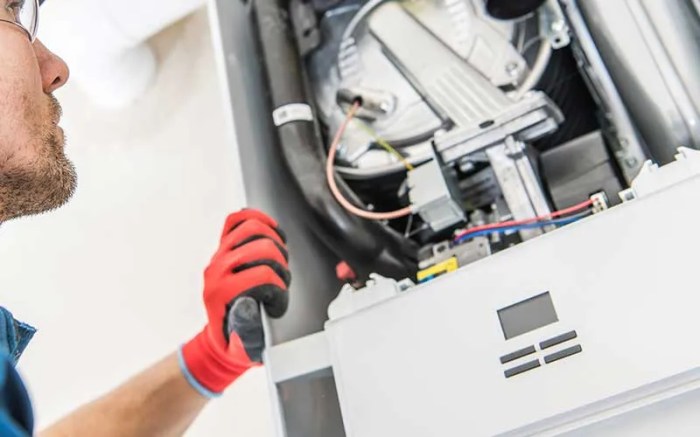
Heater in house not blowing hot air? This comprehensive guide walks you through the potential causes, from simple filter changes to more complex electrical issues. Understanding the problem is the first step to a warm and cozy home. Let’s delve into the intricacies of maintaining your home’s heating system.
This guide provides a systematic approach to identifying and resolving issues with your home’s heater, ranging from common malfunctions to more intricate problems with the thermostat or ductwork. We will cover everything from checking the thermostat and inspecting the ductwork to evaluating the electrical system and considering external factors. Follow the steps in this guide to diagnose and fix the problem yourself, saving time and money.
Troubleshooting the Problem: Heater In House Not Blowing Hot Air
Keeping your home warm and comfortable relies heavily on a properly functioning heater. Understanding potential issues can save you time and money. This section details various causes for a heater not blowing hot air, along with troubleshooting steps to pinpoint the problem.Diagnosing a malfunctioning heater involves systematically checking different components. A comprehensive approach, considering both common heater malfunctions and thermostat or ductwork issues, is crucial for effective troubleshooting.
By isolating the problem area, you can determine the necessary repairs or replacements.
Potential Causes of Heater Malfunctions
Several factors can contribute to a heater not producing hot air. These range from simple maintenance issues to more complex mechanical problems. Proper identification is key to effective repairs.
- Faulty Heating Element: A malfunctioning heating element is a common culprit. This could result from overheating, short circuits, or gradual degradation over time. If the element fails to heat adequately, the entire system won’t operate as intended. This is often characterized by a complete lack of heat or a significantly reduced output. For example, if a heater element is damaged, the air will not be heated, regardless of thermostat settings or fan operation.
- Clogged Air Filters: Clogged air filters restrict airflow, hindering the heater’s ability to distribute heat efficiently. Dust, debris, and other particles accumulate over time, leading to reduced airflow and decreased heating output. Regular filter cleaning or replacement is crucial for optimal performance. Think of it like a clogged water pipe—the flow of heat is restricted just like the flow of water.
- Malfunctioning Fan Motor: A malfunctioning fan motor can prevent airflow, preventing heat from circulating throughout the house. This issue is often identified by the absence of air movement, even when the heater is turned on. This means that even if the heating element is working, the fan is not able to circulate the warm air. This could lead to a warm spot directly in front of the heater, but the rest of the room remains cool.
- Thermostat Malfunction: A malfunctioning thermostat can prevent the heater from activating or functioning correctly. This could involve incorrect temperature readings, faulty wiring, or a complete loss of function. In some cases, the thermostat might display an incorrect temperature, while in other cases, it might not activate the heater at all. This can lead to the heater not functioning properly, or completely failing to start.
Identifying the Problem Component
Pinpointing the specific component causing the issue is vital for effective repairs. A systematic approach is recommended to isolate the problem area.
- Check the Air Filters: Ensure the air filters are clean and not clogged. Replace them if necessary.
- Verify Thermostat Functionality: Test the thermostat to confirm accurate temperature readings and ensure it is properly connected to the heater.
- Inspect the Heating Element: Look for any visible damage or signs of overheating to the heating element.
- Assess Fan Motor Operation: Examine the fan motor for any unusual noises or signs of damage. Try switching the heater on and off, or switching it to a different position to check the functionality of the fan motor.
Troubleshooting Table
The table below summarizes potential causes, symptoms, and corresponding solutions.
| Potential Cause | Symptoms | Possible Solutions |
|---|---|---|
| Faulty Heating Element | No heat, or weak heat output. | Replacement of the heating element. |
| Clogged Air Filters | Reduced airflow, weak heat output. | Cleaning or replacement of air filters. |
| Malfunctioning Fan Motor | No airflow, or weak airflow. | Replacement of the fan motor. |
| Thermostat Malfunction | Incorrect temperature display, no heat output. | Calibration, or replacement of the thermostat. |
Checking the Thermostat
Maintaining a comfortable indoor temperature often hinges on a properly functioning thermostat. A malfunctioning thermostat can lead to inconsistent heating, wasted energy, and discomfort. This section will guide you through various thermostat types, potential problems, and troubleshooting methods to ensure your heating system is operating optimally.Thermostats are the brains of your heating system, regulating the temperature and ensuring your home stays warm.
Understanding the different types and their nuances is key to identifying and resolving any issues. A precise calibration and careful checks of connections are vital to maintaining accurate temperature control.
While troubleshooting the malfunctioning heater in my house, I’ve been researching various potential causes. A recent online search revealed that sometimes a simple issue, like a blocked vent, can prevent the heater from functioning optimally. Fortunately, amidst my troubleshooting, I stumbled upon some delightful designs for vera bradley makeup bag bows, a delightful accessory for organization and style.
vera bradley makeup bag bows However, I am still diligently pursuing solutions to get the heater blowing hot air again, as a comfortable home environment is essential.
Thermostat Types and Potential Problems
Different thermostat types have unique functionalities and potential problem areas. Manual thermostats, while simple, are prone to inaccurate readings due to user error. Programmable thermostats offer more complex settings, but they may malfunction if the programming is incorrect. Digital thermostats provide precise temperature control and often come with advanced features, but they can experience issues with faulty sensors or display problems.
Electronic thermostats may be prone to issues with internal components, potentially causing inaccurate readings or system malfunctions.
Calibrating a Digital Thermostat
Digital thermostats are known for their accuracy and ease of use. Proper calibration ensures precise temperature control. To calibrate a digital thermostat, locate the calibration button or menu option. Follow the manufacturer’s instructions carefully. Ensure the thermostat is properly installed and positioned away from drafts and heat sources.
Verify that the thermostat’s display accurately reflects the actual room temperature.
Troubleshooting a Faulty Thermostat
Faulty thermostats can cause heating problems, making the system inefficient or unreliable. Common issues include inaccurate readings, unresponsive displays, or failure to communicate with the heating system. Before replacing the thermostat, try resetting it. If the issue persists, check for loose wires or damaged components. If the issue remains, consult a qualified HVAC technician.
Checking Thermostat Settings and Connections
Proper thermostat settings and connections are crucial for efficient heating. Incorrect settings can lead to improper temperature control and increased energy consumption. Ensure the thermostat is set to the desired temperature and that the heating system is set to the correct mode. Inspect the wiring connections for any signs of damage or looseness. A faulty connection can prevent the system from receiving the correct signals from the thermostat.
Flowchart for Checking a Thermostat, Heater in house not blowing hot air
| Step | Action | Result |
|---|---|---|
| 1 | Verify thermostat settings | Are settings correct and consistent with desired temperature? |
| 2 | Inspect wiring connections | Are connections secure and undamaged? |
| 3 | Check the power supply | Is power reaching the thermostat? |
| 4 | Reset the thermostat | Does resetting resolve the issue? |
| 5 | Check thermostat display | Does the display accurately reflect the actual temperature? |
| 6 | If problem persists, contact HVAC technician. | Seek professional assistance. |
Inspecting the Ductwork
Proper ductwork is crucial for efficient heating in your home. It acts as a vital pathway for heated air to circulate throughout your living spaces. If your ducts aren’t functioning optimally, you may experience uneven temperatures, reduced heating output, and increased energy costs. Understanding how to inspect your ductwork can help you identify and resolve these issues.Ductwork, the system of air channels that carry heated air from your furnace to your vents, plays a significant role in the overall heating efficiency of your home.
Properly maintained ductwork ensures that heated air is distributed evenly throughout the house, maximizing the warmth and comfort of your living spaces. Problems with the ductwork can lead to a range of issues, impacting both comfort and energy bills.
Importance of Proper Ductwork for Efficient Heating
Properly functioning ductwork is essential for efficient heating. It ensures that heated air is distributed evenly throughout the home, providing consistent and comfortable temperatures. Insufficient or poorly designed ductwork can lead to uneven heating, wasted energy, and increased utility costs. This is because heated air may be lost through leaks or blocked pathways, hindering the desired warmth and comfort.
Identifying and Addressing Air Leaks in the Ductwork
Identifying air leaks in the ductwork is a crucial step in maintaining efficient heating. These leaks allow heated air to escape, reducing the overall heating output and wasting energy. To locate leaks, use a combination of visual inspection and a smoke or air-leak detection method. Visual inspection involves carefully examining the ductwork for any visible cracks, gaps, or loose connections.
A smoke or air-leak detection method involves introducing smoke into the ductwork and observing where it escapes. Once identified, seal the leaks using appropriate materials, such as duct tape or mastic, to prevent further air loss.
Checking for Blockages or Obstructions in the Duct System
Blockages or obstructions within the duct system can significantly reduce the flow of heated air, affecting the heating efficiency of your home. These obstructions can be anything from dust buildup to insulation debris or even foreign objects. To identify blockages, carefully examine the ductwork for any unusual constrictions or accumulated debris. If blockages are suspected, use a flexible tool, such as a long-handled brush or a vacuum with a hose attachment, to clear the obstructions.
Thorough cleaning of the ductwork can restore its efficiency.
Inspecting the Condition of the Ductwork
Regular inspection of the ductwork is essential for maintaining its structural integrity and functionality. Inspecting the ductwork involves a thorough examination of the material, connections, and overall condition. Look for signs of damage, such as cracks, dents, or holes in the ductwork. Examine the connections for any loose or deteriorated components. Assess the overall condition of the ductwork for any evidence of moisture damage, corrosion, or deterioration.
Troubleshooting Ductwork Problems
| Problem | Description | Solutions |
|---|---|---|
| Leaks | Air escaping from ducts. | Seal leaks with duct tape or mastic. |
| Blockages | Obstructions in the ducts. | Remove blockages using a flexible tool. |
| Insulation Problems | Insufficient insulation around the ducts. | Improve insulation to prevent heat loss. |
Electrical System Evaluation
Proper electrical connections are critical for the safe and efficient operation of your home heater. Faulty wiring or a tripped circuit breaker can prevent the heater from functioning correctly, leading to wasted energy and potential safety hazards. This section focuses on evaluating the electrical system to pinpoint the source of the problem.The electrical system is a vital component of any heating system.
Understanding its workings and potential problems is crucial for effective troubleshooting. Malfunctions can range from simple circuit breaker issues to more complex wiring problems, each requiring a different approach to resolution. This section provides a systematic approach to diagnosing and rectifying electrical problems affecting your heater.
Checking the Circuit Breaker or Fuse
The circuit breaker or fuse protects the electrical system from overloads and short circuits. A tripped breaker or blown fuse indicates a problem that needs immediate attention. Failure to address this can lead to damage to your electrical system or even a fire hazard.
The malfunctioning heater in my house, failing to produce warm air, has presented a slight inconvenience. Fortunately, to combat the chill, I’ve been exploring local live music restaurants near me, live music restaurants near me , where a lively atmosphere and perhaps a bit of warmth from the band’s energy might offer a temporary solution until the heating issue is resolved.
I anticipate a prompt resolution to the heater problem.
- Locate the circuit breaker panel or fuse box for your home.
- Identify the circuit breaker or fuse associated with your heater. This information is typically found in the electrical panel’s diagram or in your homeowner’s manual.
- Check the breaker or fuse for any visible damage, such as discolouration or melting.
- If the breaker is tripped, carefully switch it off. If the fuse is blown, replace it with a fuse of the correct amperage. Never use a fuse with a higher amperage than specified.
- If the breaker or fuse trips again immediately after switching on, it indicates a more significant problem within the heater’s electrical system, and professional help is recommended.
Inspecting Electrical Wiring and Connections
Inspecting the wiring and connections ensures that all components are correctly connected and properly insulated. Loose or damaged connections can cause a range of issues, from intermittent operation to complete failure.
- Turn off the power supply to the heater at the circuit breaker or fuse box.
- Carefully inspect the wiring for any visible damage, such as exposed wires, frayed insulation, or burnt areas.
- Examine all connections for tightness and secure attachment. Loose connections can lead to overheating and potential fire hazards. Use appropriate tools to tighten or reconnect as needed. Use wire strippers to ensure proper wire lengths.
- If you find any damage or loose connections, do not attempt to repair them yourself. Consult a qualified electrician.
Comparing Different Electrical Problems
Different electrical issues can cause your heater not to blow hot air.
- Tripped Circuit Breaker: A tripped circuit breaker is often a simple problem, but it can indicate a more significant issue, such as an overload or a short circuit within the heater. Check the breaker for visible damage or looseness, and ensure the appropriate breaker is turned on.
- Blown Fuse: A blown fuse also suggests an overload or short circuit. A blown fuse often requires replacement with a fuse of the correct amperage. Check the fuse box’s documentation for the correct amperage to prevent further issues.
- Damaged Wiring: Damaged wiring, such as frayed insulation or exposed wires, is a serious safety hazard. Damaged wiring can lead to short circuits, electrical fires, and even electrocution. Never attempt to repair damaged wiring yourself.
- Loose Connections: Loose connections are common and often overlooked. This can cause intermittent issues or even overheating. Ensure all connections are tightened and secure to prevent further issues.
Troubleshooting Electrical Issues – Step-by-Step Procedure
A methodical approach is essential when troubleshooting electrical issues. Following a structured process minimizes the risk of making errors and maximizes the chance of a successful resolution.
- Safety First: Turn off the power supply to the heater at the circuit breaker or fuse box.
- Visual Inspection: Inspect the wiring and connections for any visible damage, such as frayed insulation or exposed wires.
- Circuit Breaker/Fuse Check: Verify that the circuit breaker or fuse associated with the heater is not tripped or blown.
- Connection Tightening: Carefully tighten any loose connections to ensure secure attachment.
- Professional Help: If any damage is found or the problem persists, consult a qualified electrician.
External Factors
Sometimes, the culprit behind a malfunctioning heater isn’t within the unit itself. External factors, such as the weather, insulation, and building design, can significantly impact a heater’s performance. Understanding these external elements is crucial to effectively diagnose and resolve heating issues.External factors can often be overlooked, but they play a substantial role in a heater’s efficiency. Extreme weather conditions, inadequate insulation, or flaws in the building’s design can all hinder the heater’s ability to maintain a comfortable indoor temperature.
By examining these external influences, we can gain a more comprehensive understanding of the heating system’s overall performance.
Impact of Extreme Weather Conditions
Extreme temperatures, whether scorching heat or frigid cold, can affect a heater’s efficiency. In extremely cold weather, the heater must work harder to maintain the desired indoor temperature. Conversely, in very hot weather, the heater may struggle to keep the house cool, reducing its overall effectiveness. High humidity levels can also hinder the heater’s performance, making it less effective at removing moisture from the air.
For example, a heater designed for a temperate climate may struggle to maintain a comfortable temperature during an extended cold snap, leading to increased energy consumption and potentially causing the heater to malfunction.
Influence of Insulation Levels
Insulation plays a critical role in maintaining a consistent indoor temperature. Adequate insulation helps to retain heat inside the house during cold weather and prevent heat loss during warmer months. Poor insulation forces the heater to work harder to maintain a desired temperature, leading to higher energy bills and reduced efficiency. A poorly insulated house might require the heater to operate at maximum capacity to maintain a comfortable temperature, potentially straining the system.
Identifying Building Thermal Efficiency Issues
Identifying issues with a building’s thermal efficiency involves a thorough assessment of various factors. Inspecting the walls, windows, and roof for gaps or cracks is essential. These gaps and cracks can allow heat to escape, making the heater work harder. Checking the attic insulation levels and sealing any air leaks are vital steps in improving the building’s overall thermal efficiency.
For instance, a house with significant air leaks around windows and doors will require the heater to constantly compensate for the heat loss, resulting in higher energy bills and reduced heating capacity.
How Different External Factors Affect Heater Performance
| Factor | Description | Impact on Heater Performance |
|---|---|---|
| Insulation | The amount of insulation around the house. | Affects the efficiency of the heater; poor insulation requires the heater to work harder to maintain a desired temperature. |
| Weather | Extreme temperatures or humidity. | Impacts heater performance and energy use; extremely cold weather requires the heater to work harder, potentially leading to increased energy consumption. |
| Building Design | Design flaws that impact heat retention. | Affects the heater’s efficiency; improperly sealed windows or doors lead to heat loss, requiring the heater to work harder. |
Maintaining Your Heater
Keeping your heater in optimal working condition is crucial for both energy efficiency and safety. Regular maintenance can significantly extend the lifespan of your heating system, prevent costly repairs, and ensure consistent warmth throughout your home. Proper maintenance also reduces the risk of potential hazards, such as carbon monoxide leaks.Maintaining a well-functioning heater involves a proactive approach rather than a reactive one.
By following a regular schedule of cleaning and servicing, you can identify and address potential problems before they escalate, ensuring a reliable and efficient heating system for years to come.
Importance of Regular Heater Maintenance
Regular maintenance is essential for the long-term health of your heater. Ignoring routine checks can lead to premature breakdowns, increased energy consumption, and safety hazards. A well-maintained heater operates more efficiently, saving you money on energy bills and extending the lifespan of the equipment.
Frequency and Procedures for Cleaning and Servicing
The frequency of cleaning and servicing depends on the type of heater and its usage. For most systems, a yearly inspection is recommended, but for high-use areas or those experiencing significant environmental factors, more frequent maintenance might be necessary. This involves a thorough cleaning of the unit’s components and an assessment of its overall functionality. Cleaning procedures vary depending on the heater type.
Cleaning Procedures for Different Heater Types
| Heater Type | Cleaning Frequency | Cleaning Procedures |
|---|---|---|
| Electric Baseboard Heaters | Monthly cleaning, yearly professional service | Dust and debris should be removed from the heater’s surface using a soft cloth or vacuum. |
| Gas Furnaces | Yearly professional service | Qualified technicians should clean the burner assembly, air filters, and exhaust system. This will help ensure proper combustion. |
| Heat Pumps | Yearly professional service | A professional should check the refrigerant levels, coils, and compressor. Cleaning the condenser coils and air filter is crucial. |
Routine Maintenance Checks Schedule
A consistent maintenance schedule is vital for proactive heater care. A suggested schedule includes an annual professional inspection and cleaning. A homeowner should also check the filter monthly and inspect the unit for any unusual noises or performance issues on a regular basis.
Annual Heater Maintenance Checklist
A comprehensive checklist helps ensure that all necessary steps are taken for a thorough annual inspection.
- Visual Inspection: Check for any signs of damage, leaks, or unusual noises.
- Filter Replacement: Replace air filters as per manufacturer recommendations.
- Cleaning: Thoroughly clean the heater’s components, paying attention to the burners, coils, and exhaust system.
- Professional Service: Schedule a professional inspection and servicing of the heater by a qualified technician.
- Documentation: Record maintenance dates and any issues found during the inspection.
Ending Remarks
In conclusion, addressing a heater not blowing hot air requires a systematic approach. From checking the thermostat to inspecting the ductwork and electrical system, this guide provides a roadmap to diagnose and resolve the issue. Remember, regular maintenance is key to preventing future problems. By following the steps Artikeld here, you can restore warmth and comfort to your home efficiently and effectively.
FAQ Guide
Why is my heater not blowing hot air even though the thermostat is set to high?
This could indicate a faulty heating element, a clogged air filter, a malfunctioning fan motor, or a problem with the thermostat itself. Checking the thermostat settings, air filters, and fan operation are crucial first steps.
How often should I clean my heater’s air filters?
Regular cleaning or replacement of air filters is essential for maintaining proper airflow and heating efficiency. Follow the manufacturer’s recommendations for the specific type of heater.
What are some common signs of a malfunctioning thermostat?
Incorrect temperature display, erratic heating cycles, or a complete lack of response to the thermostat settings are common signs of a malfunctioning thermostat. Calibration or replacement may be necessary.
Can extreme weather conditions affect my heater’s performance?
Yes, extreme temperatures, high humidity, or other harsh weather conditions can impact heating efficiency. Understanding the impact of weather and adjusting settings accordingly is helpful.
